Pergola and Gazebo Lighting: How to Do It Step by Step
Pergola and gazebo lighting: LED strips in the profiles or surface-mounted spots, layering light, IP44 and IP65 ratings and safe wiring by an electrician.
 František Kečkéš · Updated · 7 min read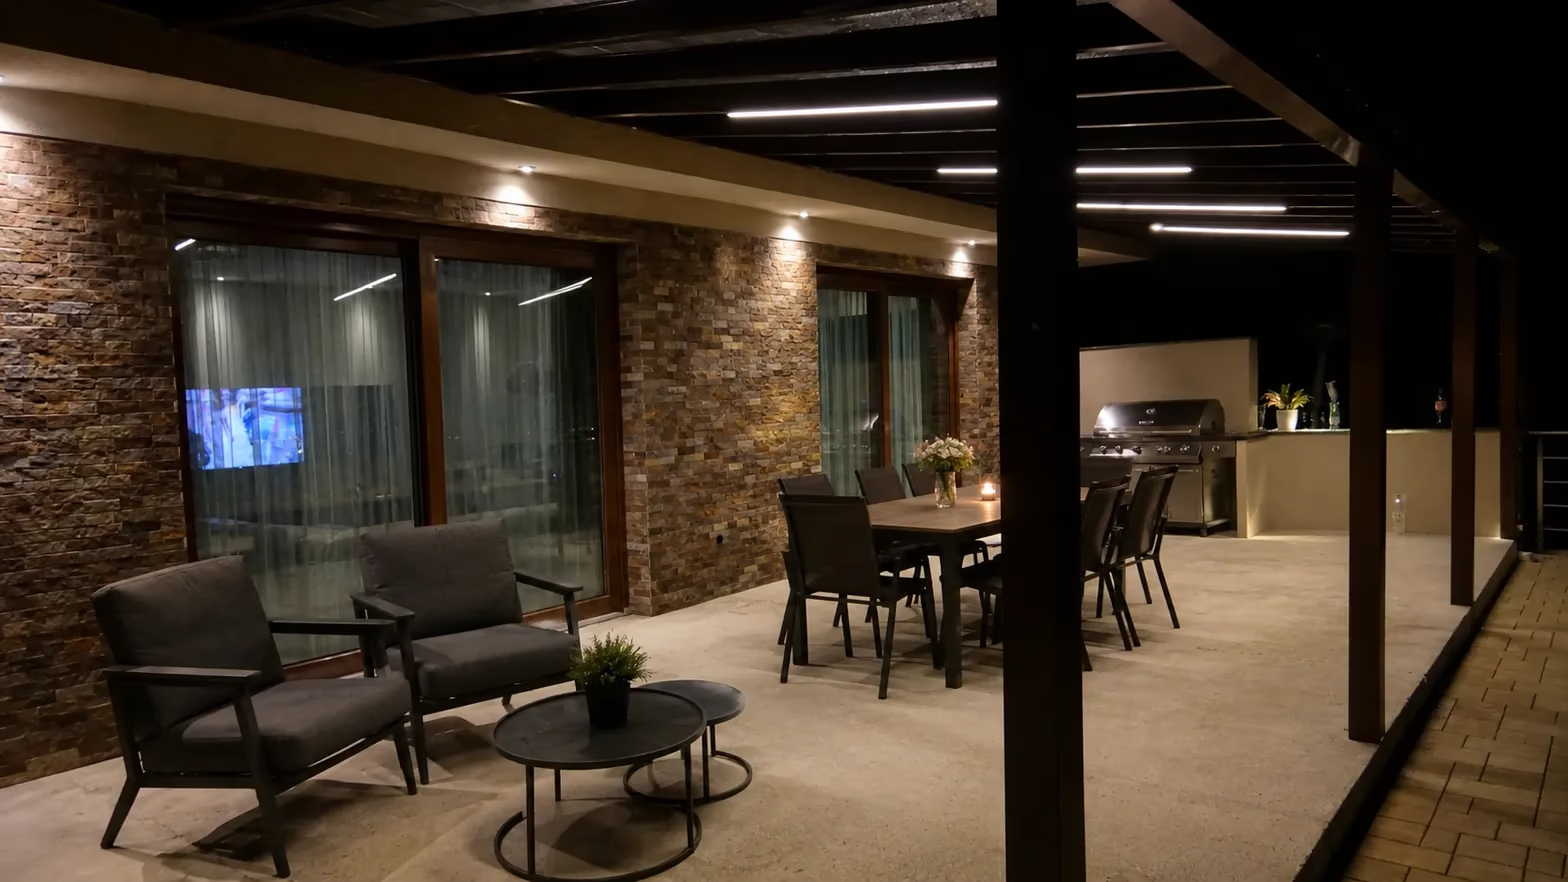
In short: Plan pergola and gazebo lighting before installation begins – cabling belongs inside the profiles, and retrofitting means visible trunking. Layer soft ambient light with task light over the table, choose a warm tone, and pick fittings with enough protection: IP44 for spots sheltered from direct rain, IP65 where rain or a hose reaches. Always leave fixed mains wiring to an electrician.
A pergola or gazebo comes into its own in the evening only once you light it. A good lighting plan decides whether the space feels like a cosy outdoor room or a dim corner no one wants to sit in after dark. In this article we draw on our own practice to show how to design the lighting, where to plan the cabling, which fittings survive outdoors, and where it pays to call an electrician.
How do you plan lighting for a pergola or gazebo?
Plan the lighting at the design stage of the structure, not once it stands. That is the single most important decision in the whole project. When we know in advance where the light should fall and how you will switch it, we prepare the profiles for concealed cabling in the workshop – the cable is then invisible and the fittings become part of the structure. At the design stage, settle three things:
- what you want to light (the whole space, the table, the path to the pergola)
- how bright it should be (relaxing versus cooking and reading)
- and how you will switch it
Those answers set the number of circuits, the type of fittings and the position of the transformer or driver. This is exactly why it pays to sort the lighting in the same phase as choosing your furniture – the seating layout dictates where the light belongs.
LED strips in the profiles, or surface-mounted fittings?
The two solutions complement each other; they are not rivals. LED strips run inside the aluminium profiles or the louvres give continuous, discreet light – you see the glow, not the source, and the space looks clean and modern. They are ideal as the base, ambient layer. Surface-mounted spots, recessed downlights and wall lights, by contrast, light with purpose:
- a spot lights the table
- a downlight throws a circle of light under the roof
- a wall light marks the entrance
In practice we combine both – a strip around the perimeter for atmosphere and a few spots over the table for work and food. On a bioclimatic pergola the strip tucks neatly into the louvres; on wooden and aluminium pergolas with a fixed roof it hides in the load-bearing profiles.
How to layer light: ambient and task
Good lighting always has at least two layers. One strong light from a single point casts harsh shadows and unpleasant glare; instead, split the light into a soft base layer and task light where you actually need it.
The ambient layer (an LED strip, diffuse downlights) lights the whole space evenly and kills the dark corners. The task layer (spots, a pendant over the table) adds light where you eat, read or prepare food.
Add a third, decorative layer – low fittings by the plants or an LED strip on a step – and the space gains depth. Control each layer separately, so that in the evening you can dim everything except a gentle outline of light.
Warm light and the feel of an outdoor room
For relaxing, choose warm white, not cool. The colour of the light decides the mood of a space more than its quantity. A warm tone (marked in catalogues by a lower colour-temperature value) feels pleasant and relaxed and turns an evening terrace into a place you want to stay.
Cool, bluish light belongs in a workshop, not over a table where you unwind. So we recommend a warm tone for both the ambient and the table layer, and keep any cooler light for work spots only.
Dimming and zoning matter too: being able to lower the brightness and switch circuits separately from the pergola is what makes a true outdoor room, one you use from dusk into the night.
Where does the cabling have to be planned?
The cabling belongs inside the profiles and has to be dealt with before installation. This is the hardest thing to put right afterwards. If the wiring is not planned ahead, once the structure is assembled you cannot get a cable into a closed profile any more – the only option is to run it in visible surface trunking, which spoils the clean look of both aluminium and wooden pergolas.
So at the design stage we set the cable routes, the position of the outlets for the fittings, and a place for the power supply or transformer, hidden yet accessible for service. We also plan where the feed from the house arrives – that is the part an electrician connects.
We can prepare the structure for lighting even if you buy the fittings later; the key is that the wiring is in the profiles from the start.
What does the IP rating mean, and which fittings to choose?
Only fittings with an adequate IP rating belong outdoors. The IP (Ingress Protection) code, under standard IEC 60529, states how well a fitting is protected against the entry of solid particles and water – the first digit covers dust and contact, the second water, as the IP Code definition explains. A higher number means higher protection.
Two levels suit a pergola or gazebo in practice. IP44 marks a fitting protected against splashing water from all directions – suitable for spots under a fixed roof where rain does not fall directly. IP65 is dust-tight and protected against water jets, so it holds up even where rain, wind or a garden hose reaches.
You read the exact figure off the fitting’s label; never put an indoor fitting outdoors, even under a roof.
Solar and battery lights: the no-cabling option
Solar and battery lights are the quickest solution, but they have clear limits. Their big advantage is that they need no cabling at all – you hang or stand them and they light up. They suit supplementary, decorative light, marking a path, or a temporary fix until you complete the structure. Let us be honest about the limits, though:
- a solar panel in a shaded pergola does not get enough sun
- in winter and on overcast days the runtime drops
- and the brightness tends to be lower than a mains fitting
Battery lights, in turn, need regular charging or cell changes. For reliable, everyday light over the table we therefore recommend fixed mains fittings; leave solar for atmosphere and for spots where a cable is not worth running.
Safety, and why fixed wiring belongs to an electrician
Always leave the fixed mains connection of the lighting to a qualified electrician. This is no place for DIY shortcuts. Outdoors combines moisture with electricity, so the installation has to be done right:
- the correct type of cable
- proper fusing and a residual-current device
- earthing
- and watertight connections
The electrician also judges whether your house wiring can carry a new circuit, and hands the work over with a compliance report. You can happily fit solar or battery lights yourself and plug fittings into an outdoor socket via a plug – but anything hard-wired to the house mains belongs to a professional. It saves you not only a possible insurance dispute but, above all, protects your health.
Maintaining fittings: cleaning, insects and seals
Even outdoor fittings need occasional care, or they lose brightness and protection. From our practice it takes little, but do it regularly. Wipe the covers and diffusers once or twice a season with a mild soapy solution and a soft cloth – dust and grease from the barbecue cut the light output more than you would expect.
Insects gather over time inside closed fittings, so open them and clear them out when you clean; do it only with the power off. Check the rubber seals: a cracked or hardened seal lets water in and lowers the IP rating, so replace it.
Fold the lighting into the regular seasonal check of the whole structure – you will find the full procedure in our pergola and gazebo maintenance guide.
How to get a pergola ready for lighting?
The best lighting is the kind that is planned for from the design. If you are planning a new pergola or gazebo, tell us about the light at the very start – we will prepare the profiles for concealed cabling, design the circuit layout around the seating, and advise on the mix of strips and spots for your terrace. The process is simple and without obligation:
- Contact us via the contact form or by phone. Approximate dimensions and an idea of how you will use the space are enough.
- We design a solution, including preparation for lighting and the recommended IP levels.
- You receive a fixed price. Lighting is one of the extras that affect the final sum – how, we describe in the article how much a bioclimatic pergola costs.
Frequently asked questions
Can lighting be added to a pergola that is already built?
It can, but with a compromise. If the cabling was not planned ahead, you can no longer get a cable into the closed profiles and it has to run in visible surface trunking. Solar and battery lights you can add any time without cutting into the structure. That is why we recommend planning the lighting at the design stage.
What IP rating should pergola fittings have?
For spots under a fixed roof where rain does not fall directly, IP44 (protection against splashing water) is enough. Where rain, wind or a hose reaches, choose IP65 (dust-tight and resistant to water jets). You will find the exact value on the fitting’s label.
Can I wire the lighting myself?
You can fit solar and battery lights and plug-in fittings into an outdoor socket yourself. A fixed connection to the house mains, though, belongs to a qualified electrician – they ensure correct fusing, a residual-current device, earthing and watertight connections, plus a compliance report.
What light is best for evening sitting?
Warm white in several layers. Combine soft ambient light (an LED strip) with task light over the table, and add the option to dim. Keep cool, bluish light for work spots – for relaxing it creates an unpleasant mood.
Are solar lights worth it in a pergola?
As a supplement yes, as the main lighting no. Solar needs no cabling and suits atmosphere or a path, but in a shaded pergola and in winter it gets little sun, gives lower brightness and shorter runtime. For reliable everyday light over the table, choose fixed mains fittings.
František Kečkéš
Founder of the family firm Gazebo. He has designed custom pergolas, gazebos and winter gardens since 2009 — from the first sketch through production to installation.
Free consultation →